
Thursday, 26 November 2015
Choosing my horns.
For my design of my Human Hybrid, I decided to use horns. It would be too difficult and too heavy for me to make the horns out of silicone, as well as it being very difficult to even stick on the horns if I had made them. So, I went on to look for shops that sold prosthetic horns. Most were retailing at around £15 for two, so I was really struggling to find pairs that fitted my hybrid on a budget. I came across an online retailer selling a pair for £6 a pair, so bought two packs of large horns and two packs of small horns. When they came I was pleasantly surprised with them. On the right in the picture is the bigger size horn, and the smaller on the left. I think that these have an appropriate shape, colour and texture to what I am looking for when it comes to the horns on my hybrid. They are both made from latex, and come with an adhesive in each back. I am really pleased with the standard of these horns, as I can really envision what they are going to look like when I apply the to the bald cap. I have chosen to put the larger horns more towards the top of the head, whilst the smaller horns are going more towards the bottom. I am going to blend them into the bald cap by blending fuller's earth up the sides. I am excited now as I have got all of the products and materials to create my hybrid.


Costume for my Hybrid.
When it came to designing my costume, I wanted to find a material that suited my creature the best. I took a trip to fabric land to see if I could find anything suitable for a reptilian hybrid. There were many printed pieces of material, but I came across this material below. I much preferred this to the printed fabrics, as this contained a lot more texture than plain fabrics. There are scales punched into this fabric, which is a leathery texture. I really liked this choice of material, so I bought a meter and a half, to make sure that I had enough to create my costume.

When I was designing my creature's costume, I did not want the clothing to take away from the look, I didn't want it being finely tailored to the model. Instead, I wanted a more organic feel to the costume, so I thought about just manipulating the shape of the material to create a loose covering of the body. In my head, I wanted the material to all gather in the back, and loosely falling down the back of my model, resembling the spines on the back of the Regal Horned Lizard. I think that this would be an effective way of making the body resemble that of a lizard's too. Below are the rough designs for my lizard woman. All are very organic shapes, and the material will not be cut to suit the model, as in the New World which is full of desert, I do not think that my creature would be making clothes but more trying to survive. I think that she would want to cover up her body to an extent, but needs something that would allow her to move quickly as she finds her prey.

My favourite design out of all three is the top design. I think this is how my hybrid would create the clothing she would be wearing, and it looks very natural. Using the scaly material supports the idea that she is a lizard. I am pleased with my designs, and think that I have chosen the right one for my hybrid. I have thought about the Brave New World that my hybrid is going to be living in, and tailored my clothing to that. My hybrid would be able to move freely in the costume, it would not restrict her actions at all.
Makeup Design for my Hybrid - Technical Folder

When thinking about my hybrid in terms of colouring and makeup elsewhere on the body, I knew that I had to reference the Regal Horned Lizard to decide. I decided on using the same colours as the horned lizard, such as greens, yellows, browns and reds. These were the main four colours, but I knew to create depth in my piece, I would have to make up darker and lighter tones of each colour. Below is my final face chart for the makeup side of the look. I have decided that only the pieces will be coloured on the face, leaving my model's natural skin colour to show through, showing that she is still half-human. I think this will be effective, as I will use the basis of my prosthetic pieces for the shapes, but then by adding colour it will make it more realistic. I am going to use a bald cap to cover the ears, as my lizard does not have ears on the outside of it's head. As it will be too difficult to make horns, I need to find some that will be appropriate for my creature hybrid. The horns of the lizard are slightly curved and pointed, so I need to do some research on where I can find some that are correct for my hybrid. For the raised sections on the face, I would like to cover them with a light coat of fuller's earth to create the cracking effect. This will add more texture to the look, which is appropriate for my lizard. My lizard has smooth textures, as well as scales so I think the smooth textures will be on the side of the head using my prosthetic pieces.

When it came to the rest of the body and the back of the head, I wanted the head to be the main part of the look, and support this with smaller pieces of fuller's earth around the arms and hands. I am going to use a bald cap to reshape the head, covering the ears as my lizard does not have ears on the outside of it's head. On the bald cap I will decorate it with the horns. I would like to find four larger horns for the top of the head, and four smaller horns for the bottom of the head. This will make the look much more fitted towards my model's head shape. To cover the bald cap, I am going to use fuller's earth. I am going to use a heavy layer and build up textures, meaning some parts of the head will not crack, but some parts will. I think that the bottom half of my look should be more dry and cracked, and the top half should be thicker as this segregates the scales from the prosthetic pieces to the fuller's earth. I am going to bring the fuller's earth down the neck slightly, to blend it into the skin. I think using the fuller's earth to crack will refer to where my hybrid is living, in a sub-tropical desert. Water is scarce in these places, and the ground often cracks up due to the lack of moisture, which will reference how the fuller's earth dries up and cracks on top of my models skin. If I blend it into the skin, I think that it will make it look like my model's skin is really drying off and cracking, as well as revealing the scales.

I have chosen to scatter the fuller's earth around the arms and chest area. I want it to look like the scales are part of her, peeking out along her arms. I was considering covering my model in fuller's earth, but I believe that it will be much more effective as I think I would lose the human essence. I have completed a diagram to show where roughly I would like the placement of the scales. By drawing out the rough sketches and designs, it visualises my ideas exactly how I want them, rather than taking images off the internet and saying that I would like parts of each. I think drawing out my ideas personally helps myself to show what I am thinking. I am happy with my final designs, and now need to look at the costume of my hybrid. I have thought about my model, as she has a tattoo on the back of her neck which I can easily cover using the fuller's earth. I think that the application of fuller's earth will not be perfect, I would like it to be more rough as to me this makes the look much more realistic and natural.
Tuesday, 24 November 2015
The Prosthetics Event, Birmingham.
On Saturday 21st November, I was lucky enough to attend the Prosthetics Event in Birmingham, hosted by Neill Gorton. It was an event that I was really looking forward to, and went along with two other students Becky Gould and Sarah Leftly. We stayed the night at Becky's House in Leicester, then on the Saturday took the trip to Birmingham. I was really looking forward to this event as last year I couldn't attend it. This year, the event was held at Aston Conference Centre, which is part of the university, where there would be back to back demonstrations in the lecture theatre, alongside retail stalls, and the Monster Mash Exhibition, Body Art Zone and the small educational stage. The event is for students, professionals, cosplay enthusiasts and fans, which means that everyone is there because we all have the same in common; we all love prosthetics. I wasn't as nervous about attending an event like this, as I was really looking forward to it, and wanted to see how much I could learn.
When we got to the conference centre, we got our tickets, and first went into the main demonstration of the day, where Neill Gorton and Stuart Bray completed character makeup for Laurel and Hardy on their two models. To create this look, they had to go through the process of life-casting, and making the prosthetic pieces out of silicone. This had obviously been done beforehand, but this was shown to us on a projector. As both Neill and Stuart were applying their pieces, they talked the audience through the processes of the look, as well as both the challenges and achievements. They started the looks off with the application of bald caps, and then began to apply and colour their pieces. The demonstration look quite a while, but it was much faster than I expected. The final looks were amazing! They looked so real, as well as very similar to the characters that they were portraying. Both Neill and Stuart did an amazing job, and thought of every little detail, such as making Laurel's neck thicker. After the demonstration, we were allowed to see the final outcome up close, and were able to take pictures of the two models.
When we got to the conference centre, we got our tickets, and first went into the main demonstration of the day, where Neill Gorton and Stuart Bray completed character makeup for Laurel and Hardy on their two models. To create this look, they had to go through the process of life-casting, and making the prosthetic pieces out of silicone. This had obviously been done beforehand, but this was shown to us on a projector. As both Neill and Stuart were applying their pieces, they talked the audience through the processes of the look, as well as both the challenges and achievements. They started the looks off with the application of bald caps, and then began to apply and colour their pieces. The demonstration look quite a while, but it was much faster than I expected. The final looks were amazing! They looked so real, as well as very similar to the characters that they were portraying. Both Neill and Stuart did an amazing job, and thought of every little detail, such as making Laurel's neck thicker. After the demonstration, we were allowed to see the final outcome up close, and were able to take pictures of the two models.
 |
| The application of the prosthetic pieces. |
 |
| Application of the Prosthetic Pieces. |
 |
| The final looks! |
 |
| The final looks! |
After the demonstration, we headed into the 'Monster Mash' exhibition, where smaller scale prosthetics were on show. This is where sculptures and moulds were on show for us to see up close. Looks from the film 'World War Z' were on show, which I found amazing as I had seen the film a couple of times. The moulds for Laurel and Hardy's characters were on show too, which allowed us to see up close how both Neill and Stuart made the pieces.


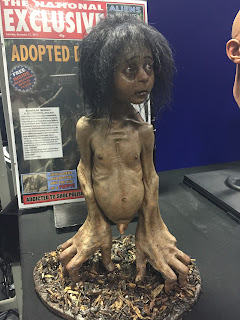




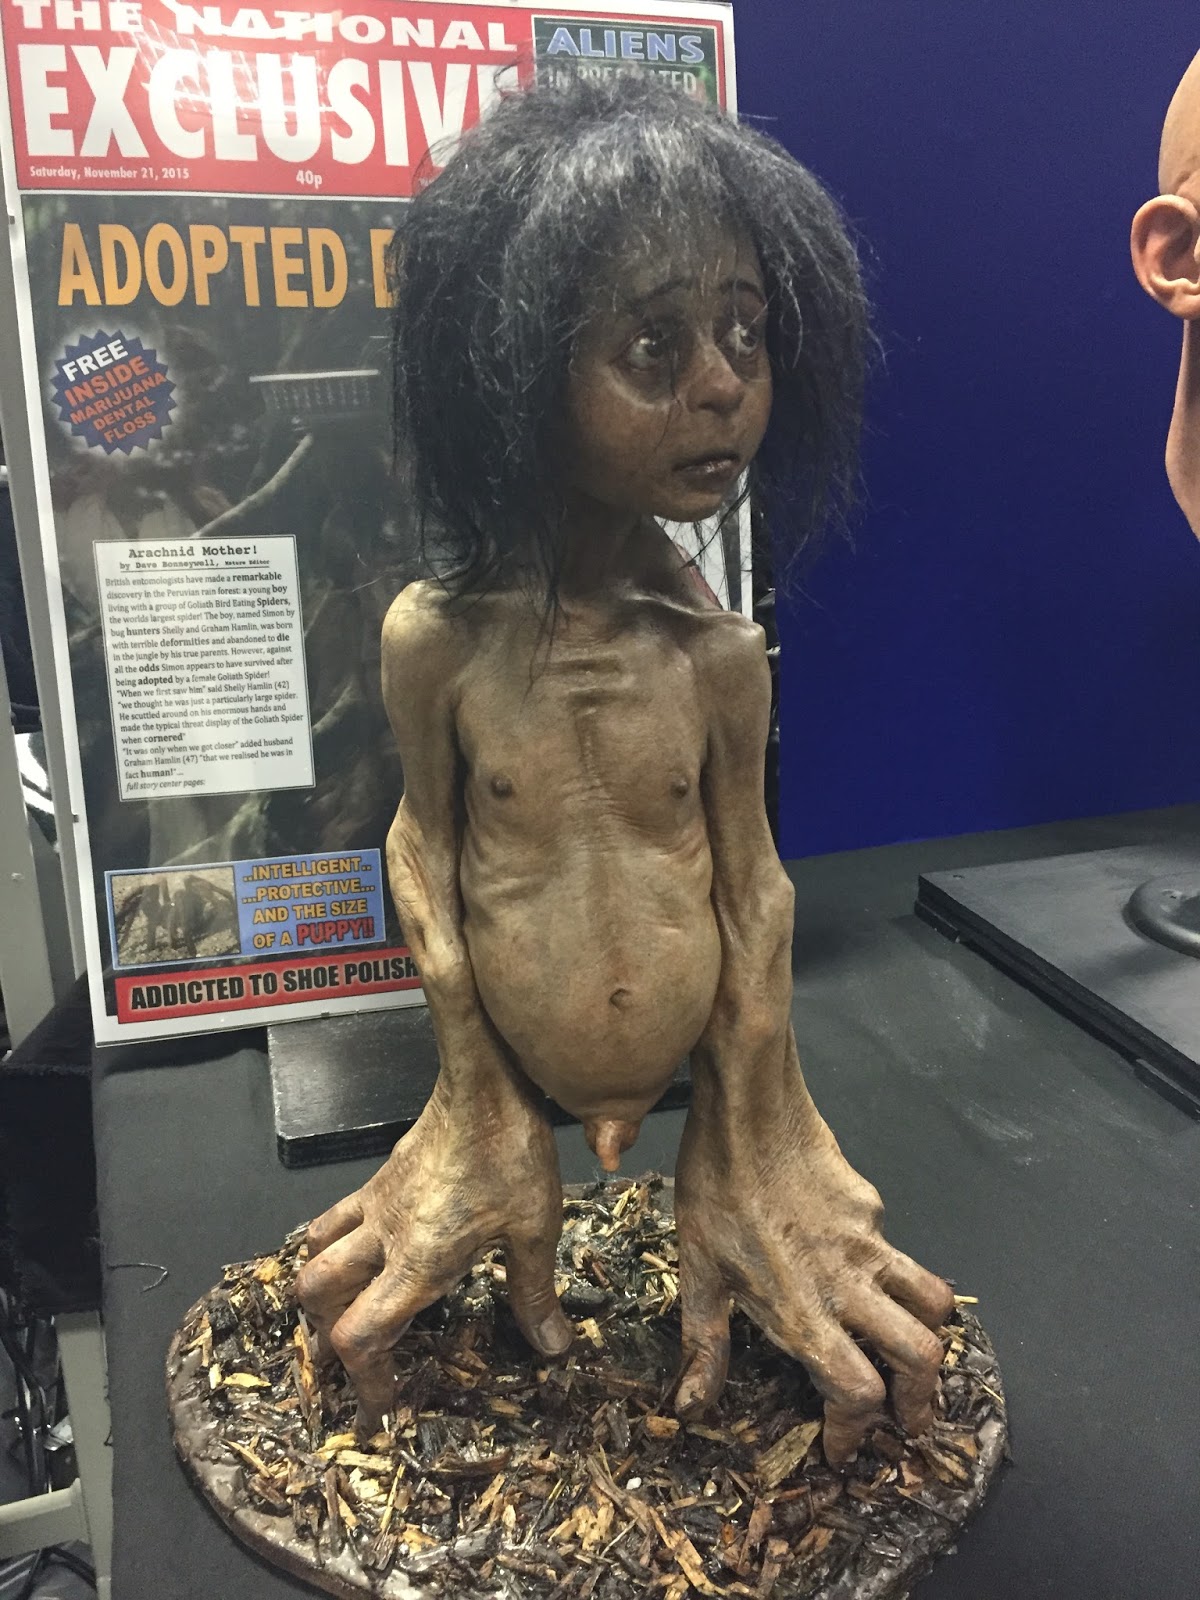


All of these looks were just so realistic, you were waiting for them to move. I have never seen anything like it so close, that we were able to see each individual detail, such as tiny minuscule hairs on the faces. It was an experience that I am always going to remember, and strive to be as good as these artists.
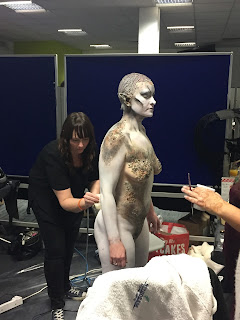
After the Monster Mash Exhibition, we looked at the Body Art Zone. This is where artists were completing whole body art looks on models throughout the day, which allowed us to see the processes of such a big look. The models were standing up for the whole day, being painted until the end of the show where the models were to walk the catwalk in their final looks. I managed to get a couple of images of the artists at work.

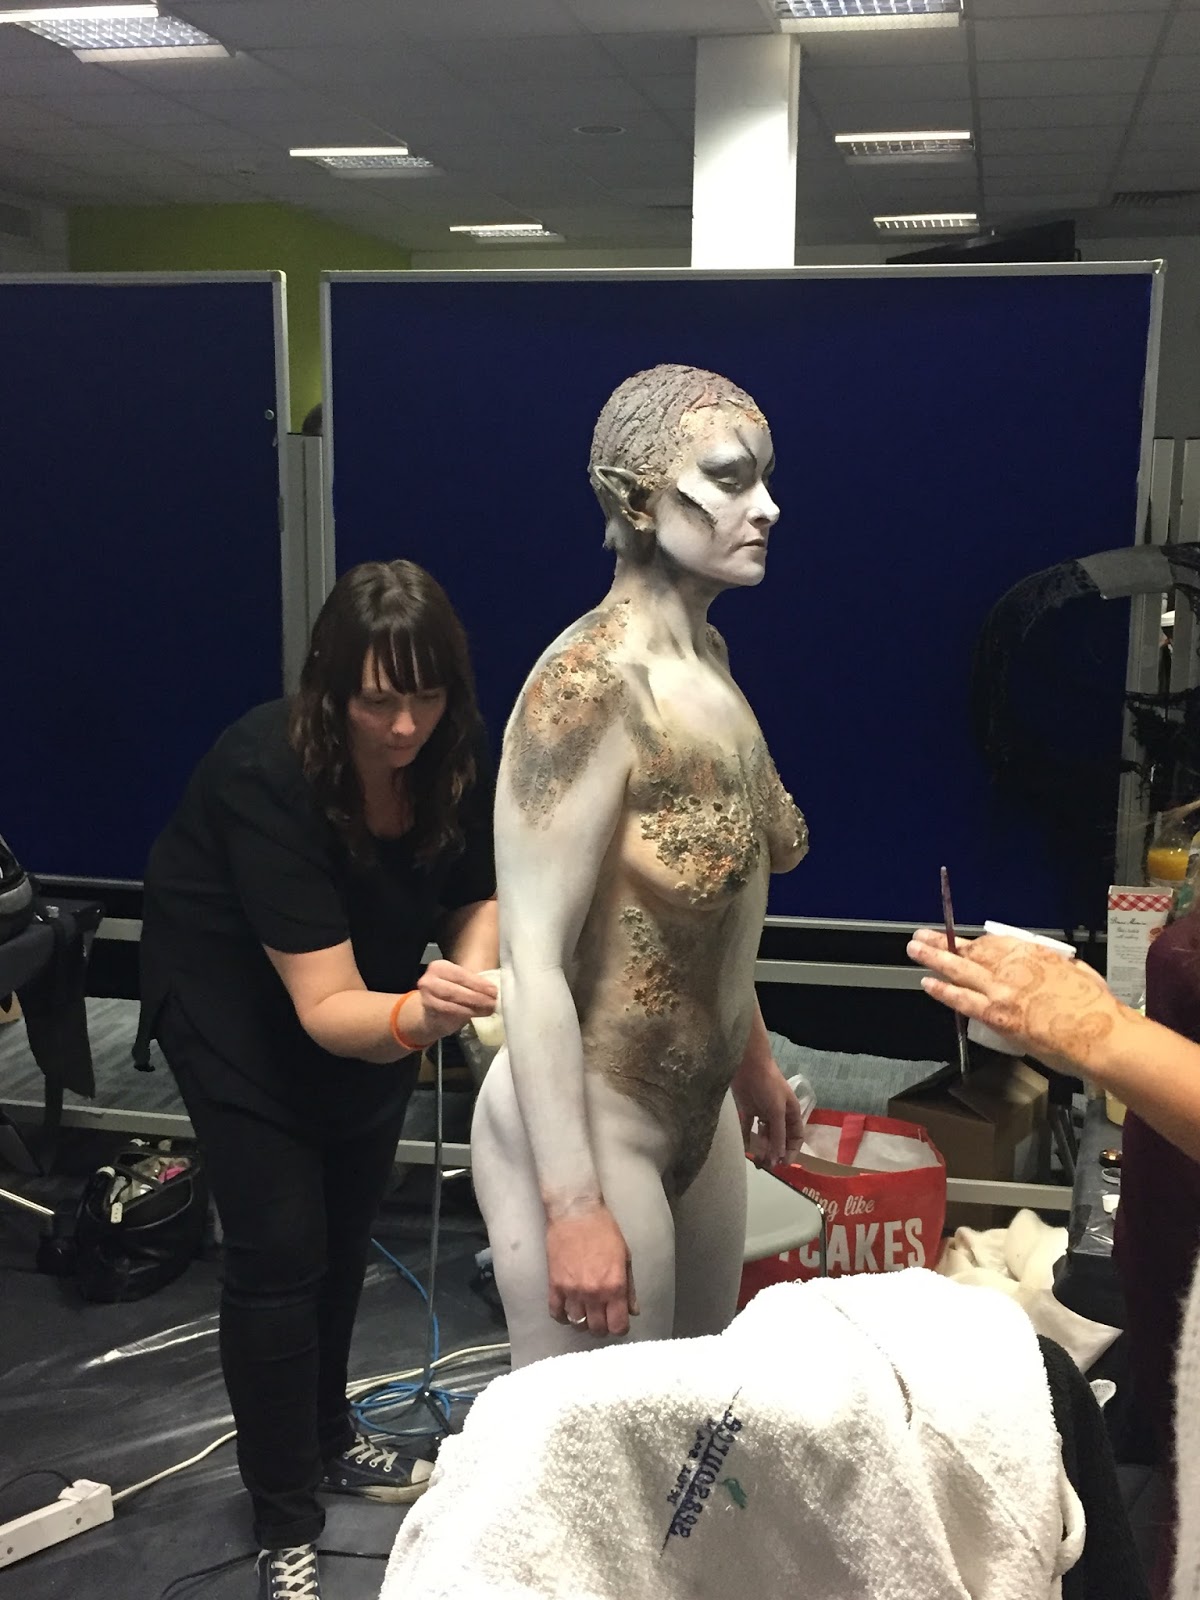

I preferred the body art that made the model's into a certain character, rather than the ones that were basically a canvas for drawings. The middle image was one of my favourite looks as the model was like an elvish character, and the artists made her look very realistic. I did like the other type of body art, but I am more into making characters.
After looking at the body art zone and talking to the artists, we took a trip into the rooms were retailers such as Kryolan, Screenface, PAM, Mould Life and Paintopia were. They had stalls showcasing their bestselling products, which was really difficult to walk through as I wanted to buy so much! I went to the Kryolan stall and ended up buying a green metallic supra colour, and a small detailing brush to use when creating my hybrid. On some of the stalls, there were resident artists creating looks with their products. Being able to see the products each and every stall had, really benefited me as I was able to see the range in front of my eyes. Being able to test out products makes you realise which ones are better for certain things than others.


Overall, I really enjoyed being able to attend this event. It was well organised, and very educational. I think I have learnt a lot as well as being inspired to create more and more looks. The whole event was a lot of fun, and it was amazing that we were able to see looks being created in front of us, allowing us to see the processes that have to be gone through to create them. As my hybrid was coming up a couple of days after, I felt very inspired by many of the stalls, and artists. I will definitely be going again next year, as this has really benefitted myself.
Using Fuller's Earth on my Bald Cap - Technical Folder
For the look, I would like to use Fuller's Earth on the bald cap as well, to create the cracking effect. I love how versatile the clay is, as you can use it both dry and wet to create a range of textures. When practising my bald cap application, I wanted to experiment with fuller's earth to see how I can create a range of looks. With this look below, I used fuller's earth, an afro comb and some gold spray paint.
First, I applied a heavy amount of fuller's earth to the bald cap, and covered the head roughly. I smoothed down the fullers earth, over the bald cap onto the forehead, and down the sides of the face. I then used an afro comb to create patterns in the clay, such as pin curls and the look of hair. I then went on the spray the whole of the head gold, using Kryolan's hair spray. I then painted my model's lips red, and this made the look very classic.
I am really intrigued with the effects that I can create using the fuller's earth. It is a more messy approach to decoration, but I really enjoyed this process. I think that fuller's earth is definitely going to be a necessity in my kit, as it is such a versatile product, and can be used for many things. My look resembles that of the 1920's, with a modern twist. Although this chosen look has very little to do with my hybrid look, I learnt a lot about the product that I will be using in my chosen hybrid look. Once I had finished the look, we placed a black towel behind the model as a backdrop, as this makes the look so much more effective, as you can clearly see the products and colours. A black back drop makes the look much more clear.


First, I applied a heavy amount of fuller's earth to the bald cap, and covered the head roughly. I smoothed down the fullers earth, over the bald cap onto the forehead, and down the sides of the face. I then used an afro comb to create patterns in the clay, such as pin curls and the look of hair. I then went on the spray the whole of the head gold, using Kryolan's hair spray. I then painted my model's lips red, and this made the look very classic.
 |
| 1920's hairstyle. http://www.haircutsmakeup.com/wp-content/uploads/2015/06/1920s-hairstyles-4.jpg |


Wednesday, 18 November 2015
Creating my reptile scales - Technical Folder
For my hybrid, I need to begin designing the makeup look to support the prosthetic pieces. My main concern was how to recreate reptile scales, as I was unsure of how I would go about this. I thought about the many materials, stamps, or stencils I could use, when I thought of Fuller's Earth. I knew from experience of using this product that, as it dries out on the skin, it cracks. I wondered whether the cracks formed during this process would be able to replicate the scales of a reptile, so I decided to test my theory out. I haven't seen this done before, so I was really intrigued as to what the outcome would be.

I began by mixing up a small quantity of Fuller's Earth and Water, to make a paste. I didn't know what consistency I would need, so made one that was not too dry, but not too wet.


I began by mixing up a small quantity of Fuller's Earth and Water, to make a paste. I didn't know what consistency I would need, so made one that was not too dry, but not too wet.

I then used a makeup brush to smooth on the paste, on two sections of my arm, and some on my hand. I wanted to see how the mixture would dry on a flat surface, and on a moving surface. I also completed two swatches on my arm; one using a thicker amount of paste and one a very thin layer. I needed to know which amount would create better looking scales, if any.


I let all of the tests dry. The thinnest swatch was very very thin, meaning that there was not a lot of product to cause the cracks. This did not work, so I will not be using a thin layer.

On my hand, the clay took longer to dry, but I really liked the effect it was making as it was drying. There were darker patches where it had not dried out completely, which gave the clay more than one shade of brown, and as it was uneven, reminded me of a reptile print.

The clay that was layered thickly on my arm began to dry, and with the thinner test, I went over it with more clay so that I was able to test out colour on the clay later on.

This is the outcome of the cracking on the hand. I really like this technique, as it is so similar to the scales of a reptile. By letting the clay dry on it's own, meant that the shapes that were created were very organic and realistic. I will definitely be using this technique in my hybrid, even if just a little.

This is the outcome of the thickest arm test. I really love this outcome, maybe even more than the hand test. I love the way the clay has cracked, and it really does remind me of the lizard scales. But it reminds me even more of the cracked sands found in the Atacama desert. This will be an interesting concept, as some people may see this as just the lizard scales, whilst some people will think of the effect as the desert sands, as they are being sucked of their moisture.

This was the test where I layered the clay on. I feel the thinner the clay, the more delicate the scales turn out. I am really pleased with all of these tests, and think I will be able to use them all in my hybrid, as scales on a reptile's body are all different shapes and sizes.

What I did next, was test out is I could make raised shapes in the clay, but still have the effect of the scales. I built up the clay into tiny horns, and waited for them to dry.

I did not like this effect as much, as when the clay was drying, it was coming off in big clumps because of how thick the clay was in certain places. I think with Fuller's Earth, there is a fine line between too thin and too thick, otherwise the effect will not work.


After testing this out, and really liking the tests that I had completed earlier, I went on to think about the colourings. The main colours in my Hybrid are going to be greens, yellows and reds, so I made up a couple of darker tones of these colours, and began to work into the scales. I knew that when it comes to the day when I have to create my hybrid, I will not have an abundance of time, so I needed something that would be quick, easy and effective. Using my aqua-colours, I worked roughly into the two test spots, leading to these:


I am really pleased with the way these two colour tests have gone. I now have to think about whether all of the scales will be coloured, what shape and what thickness they will be. I definitely want to use this technique in my hybrid, as it is relatively quick, and I can do this before anything else and let it dry as I work on the other parts of the look. I think that using the fuller's earth for the reptile scales makes my look much more believable, as it is a 3D effect, rather than 2D, for example, painting or stencilling the scales onto the body. I am really looking forward to creating my hybrid, as I have put a lot of thought into the processes I will use to create the whole look.
Subscribe to:
Posts (Atom)